Email Survey Overview
Email surveys let you collect feedback from customers by sending them a survey link directly to their inbox. Customers click through to complete a multi-question survey on a dedicated survey page.
Creating an Email Survey
1. Go to Surveys in the left menu and click New Survey.
2. Select Email and click Create Survey.
Once created, your email survey has six tabs: Questions, Email, Triggers, Design, Analytics, and Settings.
Customizing Your Email
Click the Email tab to customize what your outgoing survey email looks like.
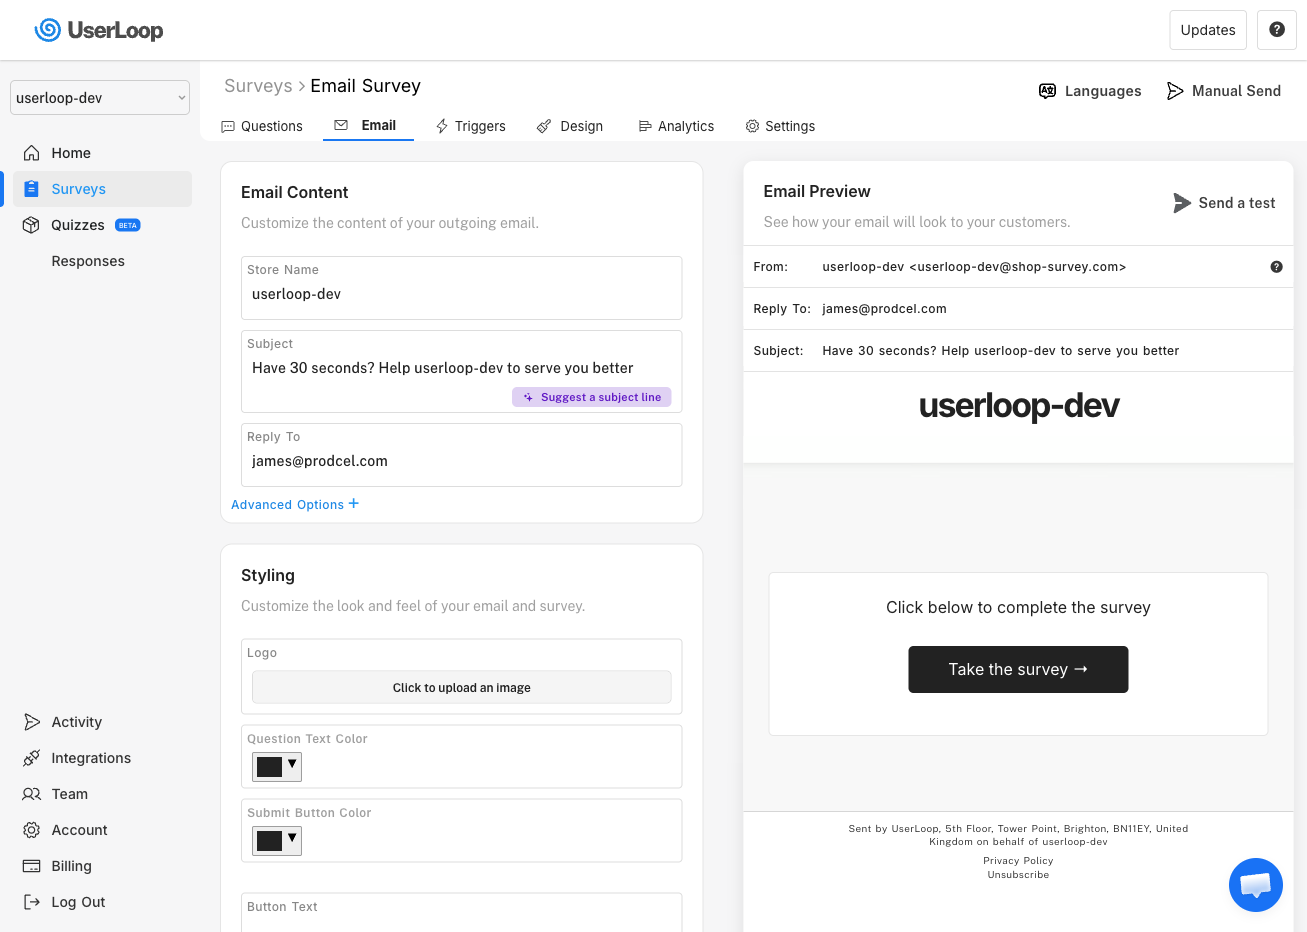
Email Content
- Store Name — Your store's name, used as the "from" name in the email.
- Subject — The email subject line. Click Suggest a subject line to get an AI-generated suggestion. We've optimized the default subject based on thousands of surveys, so only change this if you have a reason to.
- Reply To — The email address customers will reply to if they respond to the email.
- Advanced Options — Customize the headline and body text that appears in the email.
Styling
- Logo — Upload a custom logo (PNG or SVG, under 1MB). Transparent logos without a white background work best.
- Question Text Color — Set the color of question text on the survey page.
- Submit Button Color — Set the color of the submit button.
- Button Text — Customize the text on the email's call-to-action button.
The Email Preview on the right shows a live preview of how your email will look. Click Send a test to send yourself a test email.
Setting Up Triggers
Click the Triggers tab to automatically send your survey based on customer activity.
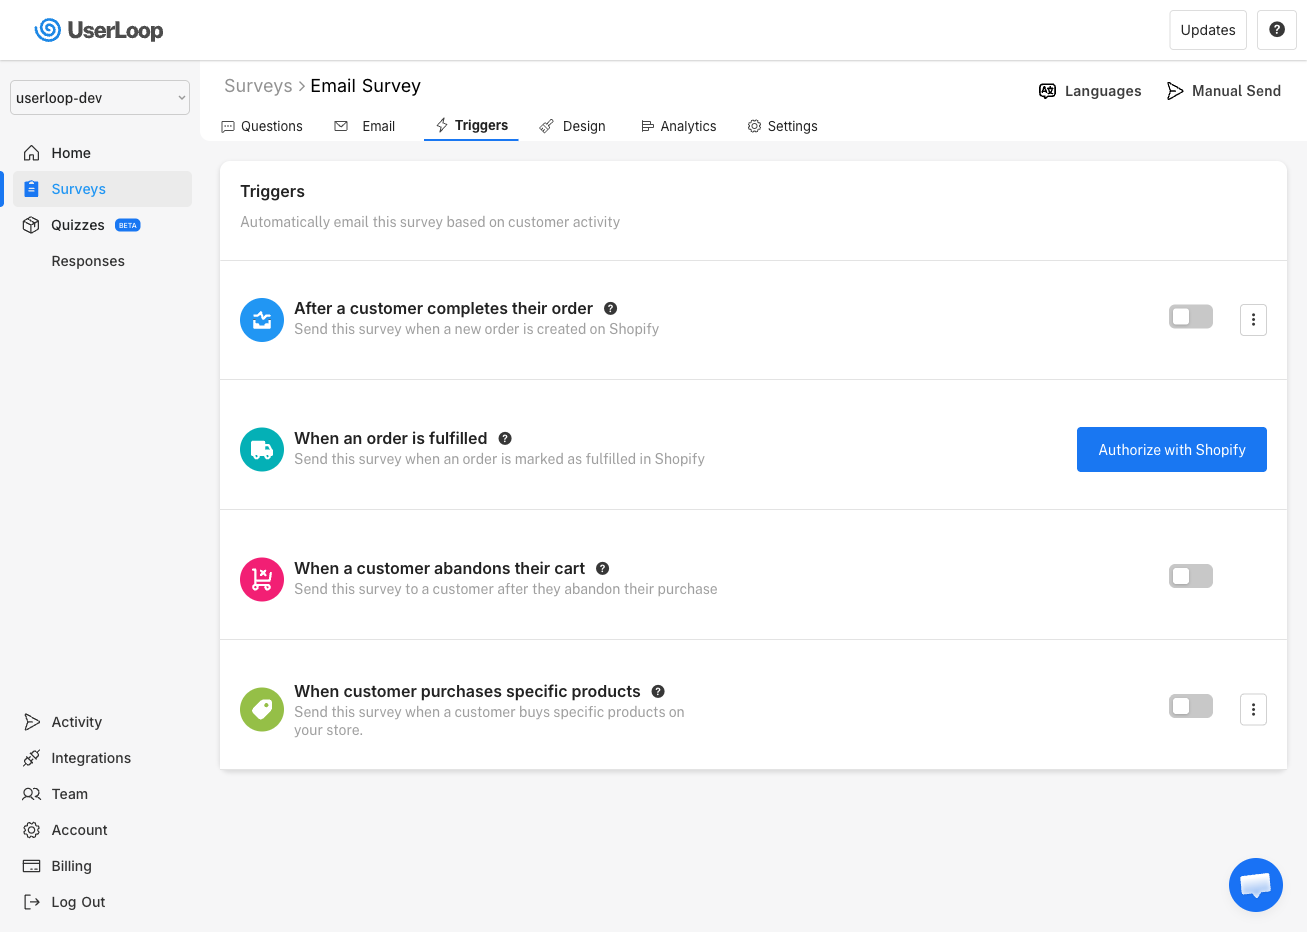
There are four trigger options:
- After a customer completes their order — Send when a new order is created on Shopify. You can configure a delay (e.g., 7 days) so the survey arrives after the customer receives their order.
- When an order is fulfilled — Send when an order is marked as fulfilled. Great for collecting feedback about the delivery experience.
- When a customer abandons their cart — Send to customers who don't complete checkout. Useful for understanding why customers didn't purchase.
- When customer purchases specific products — Send only when a customer buys certain products from your store.
Toggle each trigger on or off using the switch on the right. Click the three-dot menu for additional options like setting a delay.
Sending Manually
Click the Manual Send button in the top right corner to send your survey to a group of customers on demand. This is useful for one-off survey campaigns.
Customizing the Design
Click the Design tab to customize the look of your survey page. This includes three sections:
- Style — Set colors, submit button text, toggle the progress bar, auto proceed, and expanded mode.
- Thankyou Page — Customize the heading, sub heading, and optional button shown after a customer finishes the survey.
- Rewards — Offer discount codes to customers who complete the survey.
Need Help?
If you have any questions about setting up your email survey, reach out to us via live chat and we'll be happy to help.
Updated on: 27/02/2026
Thank you!